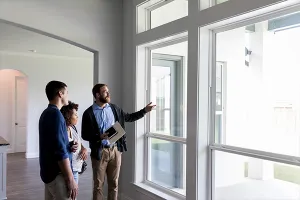
The COVID-19 economy has pumped up consumer demand for virtual home tours. These presentations, created using 360-degree and 3D tour technology, provide an immersive experience for viewing homes while limiting in-person contact.
Virtual tours give buyers a perspective on the home’s layout and flow that can’t be achieved with still photos, says consultant Jeff Turner of Santa Clarita, Calif. The tours help buyers weed out houses that are in their price range but that don’t fit their style, says Turner, a consultant to virtual-tour provider Immoviewer and entrepreneur in residence at Second Century Ventures and Reach, the National Association of REALTORS®’ strategic investment arm and award-winning technology accelerator. “Consumers are hungry for the opportunity to have a better online shopping experience, and to me, that’s the promise of 3D, 360-degree virtual tours.”
Data shows that virtual tours drive sales, says Amir Frank, a content manager at Matterport in Sunnyvale, Calif. Matterport studied MLS transaction data from the South, Southwest, Northwest, and Midwest from November 2016 to November 2019. The results showed listings with a 3D tour sold for up to 9% more and closed up to 31% faster than listings without them.
The cost and complexity of virtual tour technology have come down in recent years, making these tours more accessible for real estate professionals. To help you create exceptional virtual home tours, here’s a step-by-step guide to gathering equipment; preparing to shoot and edit the photos; uploading and editing the images; creating the tour from walkthrough to exit on an online platform; and publishing and marketing the tours.
Step 1: Choose Your Equipment and Platform
“We’re in the golden age of 360-degree cameras,” says Turner. “I’ve got within my grasp, right now, six different 360 cameras. All cost between $250 and $500. The cost shouldn’t be a barrier for anyone who’s doing any volume of home sales. I have a 3,400-square-foot house here in Southern California, and I can capture and turn this into a usable tour in less than 20 minutes.
“These are one-click tools,” he adds. “You don’t have to focus them. And the quality of these low-cost cameras has been improving over time dramatically.”
“To shoot a 2,000-square-foot home, it takes this [Ricoh Theta V] between five and 10 minutes,” agrees Peter Schravemade of Maroochydore, Queensland, in Australia, relationship manager for Box Brownie, a company that offers turnkey photo editing, virtual tours, and other services for real estate pros.
Besides its affordability and speed, says Schravemade, the Ricoh camera allows you to “bracket” to create the best possible images. Bracketing means taking the same photo multiple times, each with a different exposure, which helps ensure your tour includes exceptional interior and exterior views. He recommends shooting from three to five different exposures, then editing them together to create a bracketed image.
Matterport’s higher price results from its function as both a camera and a scanner, taking 360-degree tour photos, then creating a dollhouse-like floor plan. The floor plan is the major advantage, says Bill Lublin, CEO of Century 21 Advantage Gold in Philadelphia. Using the “dollhouse” format, viewers can go from room to room easily. However, it takes one to two hours to upload the Matterport tour, so it’s a slower process than what the Ricoh products offer.
Whatever 360-degree camera you use, you’ll also have to download a smartphone app or invest in a hosting platform for your tours. You’ll upload your photos to that platform for storing, editing, and sharing.
Step 2: Organize Photography, Lighting, and Camera Placement
Before you start shooting, open your photography app or hosting platform, and then place your 360-degree camera on your tripod. “I like to take photos exactly how I would move through a house,” says Turner, “starting with the exterior.” Take one photo from across the street and another in the front yard. Photograph both sides of the house if there’s room for your gear; then move around the house, and capture the backyard. When you’ve finished shooting the exterior, open the front door and photograph the entryway. Before taking interior shots, open doors and turn on all the lights. Open blinds and curtains, unless the view detracts from the image. “Then navigate through the house and take photos, as many as is necessary to allow people to flow through it.”
Inside, place the tripod in the center of each room with the camera set at eye height, above furniture and countertops. Then leave the room to take the photo using the smartphone app. You can take one photo per room, unless you’re bracketing your exposures or the size of the room requires more. Large rooms may need two or three images from different positions.
A Matterport camera requires a different workflow. The camera scans every corner of the room, creating a 3D dollhouse-like floor plan. Frank suggests starting at the lowest level and working your way up. Position the camera to take shots from the center of hallways and at each room’s entryway. Then put your Matterport camera in each corner of the room to create a feel for room size; the number of photos will assist the software as it forms the 3D dollhouse model.
Step 3: Upload the Tour
There are hundreds of 360-degree tour providers and hosting platforms, including Matterport, Ricoh360 Tours, Ogulo, Immoviewer, Box Brownie, Giraffe360, and EyeSpy360, says Schravemade. Many have apps that upload your photos as you take them. Editing tools on many of the platforms will stitch your images together for a seamless tour experience.
Costs vary by platform and complexity. Immoviewer has a subscription model that runs from $69 per month for five active tours to $159 per month for 20. Box Brownie uses a pay-as-you-go model in which a tour with up to 15 photos costs $16, one with 16 to 25 photos costs $24; options for image enhancement start at $1.60, and 360-degree virtual staging is priced at $64. The more complex Matterport tours fall in the $250 to $400 range.
Step 4: Create the Tour, From Walkthrough to Exit
Many editing programs, including Box Brownie and Immoviewer, will put your photos in the right sequence as they upload; as long as you take your photos in the order of the flow of the home’s floor plan, they’ll be properly arranged for the virtual tour.
If you’re using Matterport’s software, after you upload your photos, they’re processed into the 3D model in the correct order. You can then start adding “Matter Tags” and highlight reels, embedding videos and brochures, and labeling rooms and dimensions, says Frank.
If you have the editing skills to stitch the images together yourself, Schravemade recommends programs such as Adobe Lightroom and Photoshop, available as an online subscription for $9.99 per month as part of the Adobe Creative Cloud package. (A subscription to the full Adobe Creative Cloud costs $52 per month, but most users need only those two apps.)
With Immoviewer, “those tours are live the moment they’re uploaded. So if you’ve got a good [wireless] connection from the house and you use the app, the moment those images are uploaded, that virtual tour is live and ready to go,” Turner says.
Matterport’s detailed scanning and photography process can take a couple of hours to finish uploading. Once that upload completes, it then takes 24 to 48 hours to process. That’s when you’re able to start tagging and adding specs and points of interest. Box Brownie uses manual stitching for its photo editing process and has a 24-hour turnaround, says Schravemade.
Step 5: Publish and Market the Tour on Multiple Channels
Platforms such as realtor.com®, many MLSs, and social media are ideal places for publishing your virtual home tour. You can embed the tour link in email campaigns and text messages or drop it straight into Facebook, says Schravemade.
Once the images and 3D model have been created, Frank says, the Matterport system “automatically generates photos it thinks are usable in your marketing campaigns, as well as a few short teasers, which are great; you can easily download a GIF or MP4 [video] file and use it in your marketing campaigns.”
Make virtual home tours part of everything you can, whether it’s inexpensively with Immoviewer or Box Brownie or more fully immersive with detailed Matterport tours, Lublin advises. “People are more hesitant to enter properties now, but there’s a tremendous demand, and providing them the ability to see and choose to eliminate properties online is a powerful tool,” he says. “You always want to be seen as tech-forward. Now it’s easy to be tech-forward.”
Turner estimates 95% of listings still don’t have a true virtual tour, even amid the pandemic. “I wish [agents] wouldn’t be so hung up on perfect image quality, especially with a virtual tour,” he says. “Do one, get it up there, and give consumers this experience they’re looking for. A 360-degree camera is going to do a really good job of capturing an above-average image of the room.”


